Or how to learn that you actually don't need to sleep.
Well, last week was about how I made a first steps in prop making, today post is how I learned to compete in prop making Olympics aka Cosplay. Because sure as hell I felt like amateur runner going to Olympics...
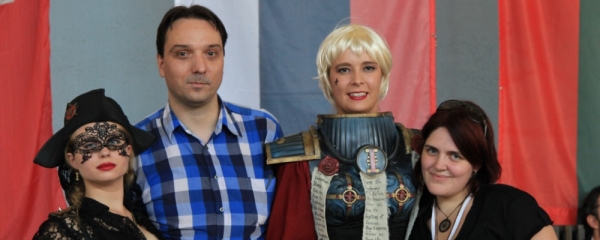
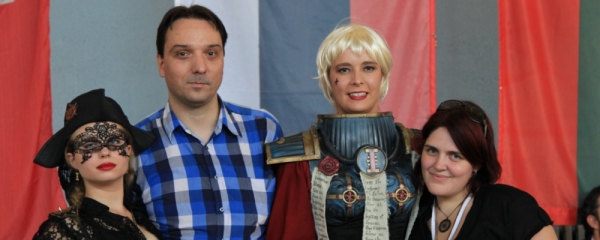
For a various reasons it fell to me and my friend Maki to make this costume, or at least most tricky part - armor.
First we decided to go after more standard Battle Sister look, rather than Ordo Famulous that her character was due the recognizability factor.
Suitable ilustration:

Nice, ain't it?
Then I drew a vaguely human shape (little better than a stick figure) and pointed to all the parts we need: breast (boob) plate, pauldrons, leg armor, arms armor, backpack, gorget and all detailed ideas how those parts would look when finished. I think there was pretty high level of not understanding what is actually possible to do with available materials, but that, improvisation due the lack of proper materials will be separate article...
I wish that drawing survived, but alas it was either lost in the Mordor of the workshop or somewhere in gazillion of the Maki's illustrations...

Then we decided what materials to use. We knew that we can forget about using "real" cosplayer methods due the lack of easily available materials, so improvisation was a name of the game. "Adapt, improvise, overcome" as Clint Eastwood character form Heartbreak Ridge (incredibly corny yet funny movie) would say.
I looked at every cosplay of Sister of Battle there was, but a problem was that there were very few good ones - best among those was by Okkido Cosplay (who also has own page on Althemy - http://okkidocosplay.althemy.com/ ). So, armed with inspiration, we started tackling largest problem that we had - how to transfer ideas into the reality with materials that we had.
So, it was flower pots for the pauldrons, large flower pot for a gorget, mannequin torso for a breastplate base, plastic bowls for fake boobs, Pringles containers for the base of arm armor etc. Which led to no end of funny scenes...
- trying to fit front part of mannequin torso on JJ to the wonder of the store owners. She is about 176cm tall, and those damn things were made to represent midgets obviously.... Finally, when we have almost given up all the hope we have found one dusty, scratched and unliked mannequin front part that barely fitted. Our team vs Cosplay - 1 : 0
- trying to find appropriate bowls for a fake boobs. It included, among other things very loud conversation and discussion of what would be "too large boobs" in the middle of the packed store, then trying them on JJ while people starer at us. Finally, Maki located good sized ones. Our team vs Cosplay - 2 : 0
- Trying to fit flower pot on JJ head in the middle of the store. Fits! Our team vs Cosplay - 3 : 0
- Bying absolutely insane combinations of the articles at home depot/DIY/Chinese store. I am absolutely sure that at least one person thought that we were either cooking meth or making a bomb.
- Buying every last super glue that could be found in the stores at about 1 km radius around workshop.
- Using about 2kg of the hot glue to hold it all together.
Clothes parts were made by Jazzy, and since I have no idea how it was actually done I will let her to make a comment on it.
Parts of armor, and how they were made:

Breastplate - front part of the mannequin with plastic bowls for "boobs", fleur de lys from a cheap jewelry, plasticard and thumb tacks decorations . Purity seals were sculpted by Maki, then we made moulds and cast them in the dental plaster, after which I painted them.
Prayer clothes were done by Maki.

Pauldrons were made from flower pots, with plasticard decoration.

Backpack/power source was very easy to make, core was made out of insulation foam and cardboard, then covered by plasticard, decorative plasticard edges and thumb tacks for rivets. Fleur de lys was sculpted by Maki.

Bracers were another easy part, base was made from Pringles cans, covered by plasticard and decorations added.

Legs. Ugh. Remember that "nothing can stop us", 3 : 0 for "Our team vs Cosplay"? Well, material (or lack of them) scored at least two vs our team...
First I could not find 2 or even 5 mm thick plasticard to make base of legs. Result - I had to use 10mm which made leg armor much thicker and heavier than intended.
Then we could not find hard enough 1mm thick plasticard, and I had to cover legs with softer one, which limited curves I could make, which further added to the bulkiness. Truth be told I almost gave up here, and only a promise that I will finish it kept me going.
In the end people actually liked design, but I did not - not for a fact it is different than original, but for a fact it did not turn the way I wanted it.
Oh well. US vs Cosplay - 3 : 2.

Belt and "stuff"
Belt was cheap one, it even has fleur de lys on the buckle so we did not have to bother with it.
Boxes were from a Chinese store, and were actually first part of costume that was done. At a cons they are actually pretty handy for storing glue, paint and other "quick fix" materials.
Inquisitorial sign was made from plasticard.
Metal "prayer beads" were found in the enormous pile of junk that is my garden shed.
Grenade was made from deodorant bottle, plasticard and computer parts.
Corset is stock one.
We could not find appropriate wig, believe it or not. Our team vs Cosplay - 3 : 3
In the end it was spectacularly painted by our friends from a Pish-Posh Studio, Milan and Jovan, who have spent a sleepless night day before costume premiere. Worth at least two points.
Final score - Our team vs Cosplay - 5 : 3 - and it was a victory!

Overall work was stressful but satisfying, we have finished costume in less than two months, from the idea to the final varnish. But there were still things to improve, and that is a story for another time.
People who worked on costume:
Me
Jazzy
Maki
Milan
Jovan
and few more.
Made in local wargaming club - KlubLjubiteljaEpskeINaucneFantastikeZmaj/
Photos by TheCynicalPhotographer/ and Nox Adams
More photos of original look of the cosplay:
http://bubbaworkshop.althemy.com/viewphotos?albumid=1150


